Fixing an exhaust leak promptly is crucial for maintaining engine performance, fuel efficiency, and passenger safety. An unaddressed leak allows dangerous carbon monoxide ($CO$) gases to seep into the cabin, creates loud popping or ticking noises, and can cause your vehicle to fail emissions inspections.
Whether dealing with a small pinhole in a pipe or a blown manifold gasket, fixing the issue depends on the leak’s severity and location along the exhaust system.
Other Signs of an Exhaust Leak
Besides unusual noise, an exhaust leak may cause sluggish acceleration, increased fuel consumption, or burning smells. A leak near an oxygen sensor can interfere with fuel-mixture readings. These symptoms can have other causes, so inspection is needed before choosing a repair.
Step 1: Safely Locate the Exhaust Leak
Before applying any sealant or replacing parts, confirm the exact location of the leak while the exhaust system is completely cold:
- Visual Carbon Inspection: Safely elevate the vehicle on jack stands. Look along the exhaust manifold, flex pipe, flanges, and muffler for black, powdery soot marks—this indicates escaping exhaust gas.
- The Soapy Water Test (Cold Engine Only): Spray a mixture of dish soap and water onto cold exhaust pipes, joints, and flanges. Have a helper start the cold engine. Look for expanding soap bubbles—this pinpoints escaping air before the system heats up.
- Spray a mixture of dish soap and water onto cold exhaust pipes, joints, and flanges.
- Have a helper start the cold engine.
- Look for expanding soap bubbles—this pinpoints escaping air before the system heats up.
- Listen for Noise Profile: A sharp, rapid ticking noise near the engine bay usually indicates an exhaust manifold crack or blown head-flange gasket.A deep roaring or sputtering noise under the middle or rear of the vehicle indicates a damaged flex pipe, split seam, or rusted muffler.A sharp, rapid ticking noise near the engine bay usually indicates an exhaust manifold crack or blown head-flange gasket.A deep roaring or sputtering noise under the middle or rear of the vehicle indicates a damaged flex pipe, split seam, or rusted muffler.
- A sharp, rapid ticking noise near the engine bay usually indicates an exhaust manifold crack or blown head-flange gasket.
- A deep roaring or sputtering noise under the middle or rear of the vehicle indicates a damaged flex pipe, split seam, or rusted muffler.
3. Professional Smoke Testing: If the leak is difficult to locate, a technician can use a smoke machine to reveal openings in the exhaust system before selecting the repair method.
Step 2: Choose the Correct Repair Method
Different sections of the exhaust line experience varying levels of heat, vibration, and pressure:
| Leak Location | Recommended Repair Method | Estimated DIY Cost | Longevity |
|---|---|---|---|
| Exhaust Pipe Pinholes / Small Cracks | High-temp exhaust tape + metal backing wrap | $15 – $30 | Temporary (Months) |
| Split Seams / Pipe Breakage | Stainless steel exhaust sleeve clamp + exhaust putty | $25 – $50 | Semi-Permanent |
| Leaking Pipe Flange / Joint | Flange gasket replacement + high-temp RTV sealant | $20 – $40 | Permanent |
| Damaged Flex Pipe | Weld-in or bolt-on replacement flex hose section | $40 – $100 | Permanent |
| Cracked Exhaust Manifold / Blown Gasket | Professional gasket replacement or manifold swap | $100 – $400 (Parts) | Permanent |
DIY Repair Steps for Small Pipe Leaks & Pinholes
For minor pinholes or small surface cracks along straight sections of the exhaust pipe, follow this step-by-step sealing process:
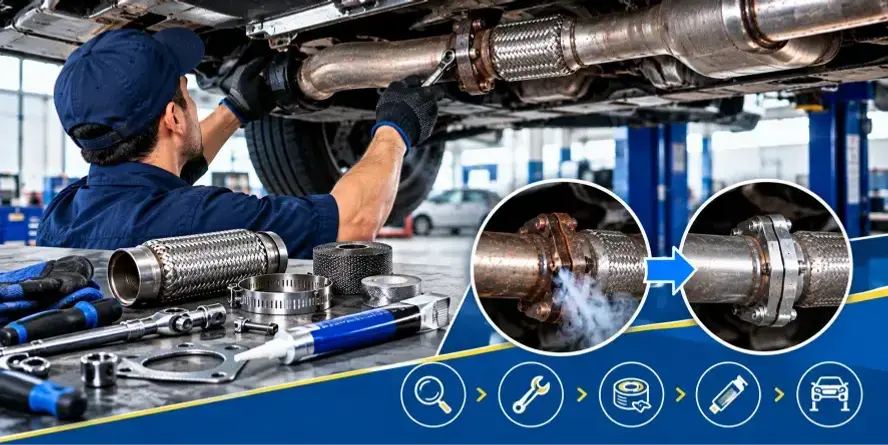
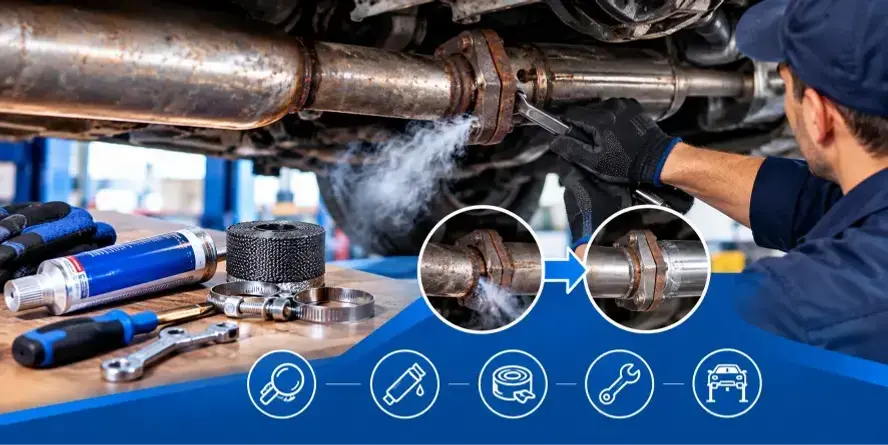
- Prep the Surface: Thoroughly scrub the leaking area using a wire brush and coarse sandpaper (80–120 grit) to remove rust, road grime, and loose paint. Clean the area with brake cleaner or isopropyl alcohol to ensure proper adhesion.
- Apply High-Temp Exhaust Putty: Spread a generous layer of sodium silicate-based exhaust repair paste/putty directly over the pinhole or crack.
- Wrap with Fiberglass Exhaust Tape: Dip high-temperature exhaust repair tape in water (if required by product instructions) and wrap it tightly around the pipe, overlapping the leak by at least 2 inches on both sides.
- Secure and Cure: Wrap stainless steel hose clamps over the tape ends to prevent peeling. Start the engine and let it idle for 15 to 20 minutes; the exhaust heat will cure and harden the tape and putty into a solid shell.
When to Seek Professional Shop Repair
Temporary putty and wraps are short-term fixes designed to quiet exhaust noise until proper repairs are made. You should take your vehicle to an automotive shop if:
- The leak is at the Exhaust Manifold: High combustion heat ($700^\circ\text{C}+$) will destroy surface tape or epoxy immediately.
- The Pipe is Severely Rusted: If the metal is thin and flaking, wrapping it will only cause the pipe to collapse further down the line.
- Broken or Snapped Studs: Removing seized or broken exhaust bolts requires specialized extraction bits or oxy-acetylene torch heating.
- Exhaust Smells Enter the Cabin: Any leak posing a risk of carbon monoxide entering the passenger area should be permanently welded or replaced.
Frequently Asked Questions: how to fix exhaust leak
How long does exhaust repair tape last?
High-quality fiberglass or epoxy exhaust tape typically lasts between 3 to 12 months depending on road moisture, salt exposure, and driving conditions. It is best used as a temporary patch.
Can J-B Weld fix an exhaust leak?
Standard J-B Weld epoxy cannot withstand exhaust system temperatures. You must use specialized high-temperature exhaust sealants (such as J-B Weld ExhaustWeld or Permatex Muffler & Tailpipe Sealer) rated for temperatures above $500^\circ\text{F} – 1000^\circ\text{F}$ ($260^\circ\text{C} – 537^\circ\text{C}$).
Will an exhaust leak cause a Check Engine Light?
Yes. If the leak is located upstream of or near the oxygen ($O_2$) sensors, outside air drawn into the pipe tricks the ECU into detecting a lean condition, triggering error codes like P0171 or catalyst efficiency codes like P0420.
Is it safe to drive with an exhaust leak?
No. Driving with an exhaust leak exposes vehicle occupants to carbon monoxide fumes, creates a fire hazard if hot gases blast against fuel lines or wiring, and can damage surrounding engine components.
Why Does an Exhaust Leak Make a Ticking Sound?
Exhaust leaves the engine in pulses. When those pulses escape through a small manifold crack or gasket gap, they can produce a rhythmic ticking sound that changes with engine speed.
Key Takeaways: How to fix an exhaust leak
- Locating the Leak: Use a cold-engine soapy water test, smoke machine, or visual inspection for black carbon soot buildup along joints and pipes.
- Temporary / Minor DIY Fixes: Small pinholes, cracks, or minor pipe tears can be temporarily sealed using high-temp exhaust putty, repair tape, or stainless steel sleeve clamps ($15 – $40 USD / CAD).
- Permanent Repairs: Cracks near the engine, blown gaskets, snapped manifold studs, or severely rusted pipes require gasket replacement, pipe section welding, or complete component replacement.
- Safety Warning: Never attempt a temporary tape or putty patch on an exhaust manifold or downpipe—extreme temperatures near the engine will burn through temporary patches.